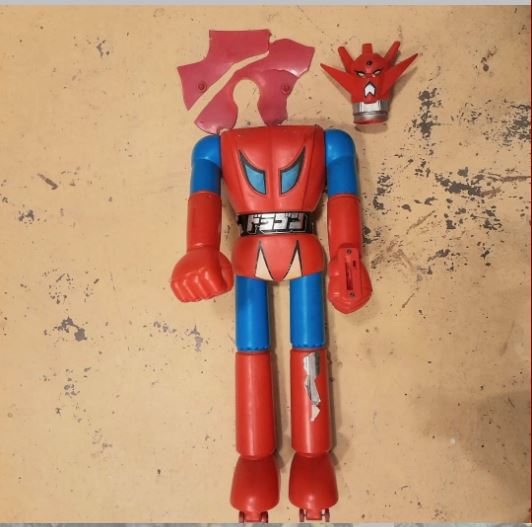
My love of Japanese robots started when my dad brought back a small 6 inch soft vinyl moulded robot from San Francisco's Japan Town when he visited during the 1976 Bicentennial celebrations.
I was blown away by the design work, especially when I noticed what looked like jet engines sticking out of the top of it's head! On closer inspection I discovered there was an entire spaceship parked inside his bonce!
Soon after that Mattel Toys released their Shogun Warriors range featuring the same character at a whopping 24 inches tall!
The initial release was Great Mazinger, Dragun and Raydeen. I saw all three in the window of Sydney's Fantastic Toy and Hobby shop and instantly fell in love with them. At $30 each (probably the equivalent of a $100 toy today) there was no way I could afford them and I almost cried myself to sleep!
As luck would have it, a discount department store later offered them for $18 each and I ordered all three on lay-by (remember that purchase option, Boomers?)
Anyway, 40 plus years later, a friend came into possession of a set of three that desperately needed my special brand of TLC!
First up we have Dragun, his decals were missing or damaged and his cape was disintegrating from UV damage, but he was otherwise not in bad shape, so I started with him.
I traced the Cape shape from my intact version and decided to make a replacement from Red polythene plastic to replicate the original, despite the difficulties with using that plastic type.
I bought a dustpan tray, but decided an existing (unused) cat litter tray had a better colour match to the original toy.
I thought about cutting the polythene with a heavy craft knife, but the plastic can be hard and can crack (despite it's flexibility) and the blade started to skid across the surface, so I fitted a 3mm twist drill in my Dremel moto tool and drilled at an angle, so I could use the side of the drill as a cutting tool! (Make sure you have eye protection in case the drill snaps from this unusual stress!)
I lightly buffed the piece with 5000 grade steel wool to take out any scratches and carefully cut off the originals shoulder spikes and mounted self tapping screws inside them with super glue. Despite polythene's resistance to glue, if you scuff up the surface with coarser steel wool, you can get glue to stick.
I laid toilet paper over the original stickers and left them to soak with turps to soften rhe dried out adhesive (fine for polythene, don't do this with styrene or the surface will dissolve -use lighter fluid instead!) I removed the remnants of the stickers, stuck them to graph paper and scanned them with my multi function colour laser printer.
I put that picture into my vector program (Corel Draw) and copied them exactly, using the vector lines to make perfect, un blurred edges that could be scaled to any size. I then printed them out on the printer using metallic foil origami paper (Do you have Daiso stores in the UK? An amazing chain of Japanese $2 shops -well, OK, actually $2.90 shops!)
I cut out the decals and stuck them on with 3M Super77 spray adhesive -expensive, but the absolute best in terms of longevity!
The last pic shows my original Dragun on the left and my restored version on the right. Not a perfect forgery, but pretty good to all but the most informed eye!
And yes, there is more to come!
Looey
Oz


Amazing work Looey. An inspiration!
ReplyDeleteBeautiful job. It certainly involved a lot of work.
ReplyDeletewonderful work Looey, the two are almost indistiguishable!
ReplyDelete