
One of my earliest Gerry Anderson toy-related memories is being given a Fairylite
friction-drive Stingray around the time the TV series was first being shown.

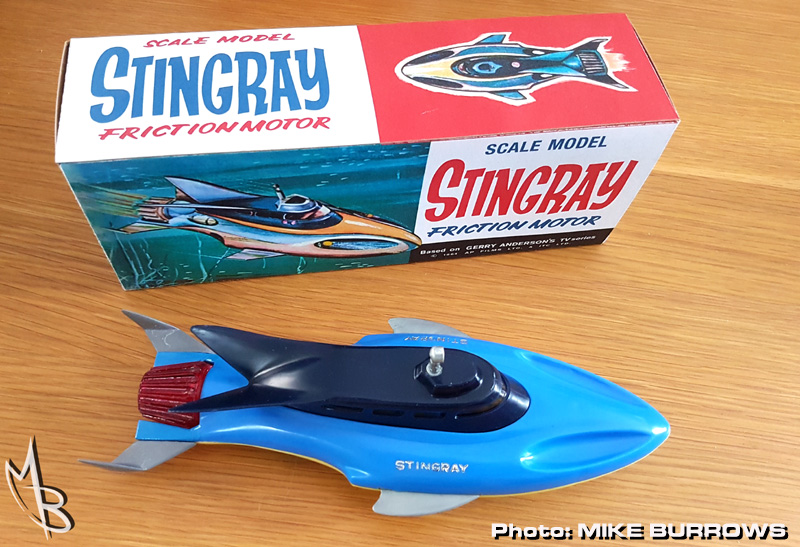
Although it didn’t look exactly like it did on the box, or its TV counterpart, I can still remember the satisfaction of owning one. It's described by some as a bit of an 'ugly duckling', but from certain angles I think it looks pretty good.

Anyway, that was way back in the mid-sixties and all that’s left of my toy Stingray is a distant memory. I’ve often thought about adding another Fairylite, to my collection, so I was
pleased to see and buy a damaged and dusty looking one on fleabay
last month for just over twelve quid.

As is common with these toys, it was missing its rear end.
The two tail fin supports and tail fins had long since snapped off and the Rate
Master was missing.
The clear plastic window section was loose but intact, and the shaft of
the original periscope was stuck down its hole on top of the cabin.
So, I set to work carefully taking the toy apart. In spite
of its damage, once I’d cleaned it up the rest of the toy was in reasonable
condition with few signs of distress. I managed to force the broken periscope
out of its hole, and glued the clear screen back into place.
I needed and got some excellent replica parts for the clear red Ratemaster, left & right hand tail
fins and a periscope from Graeme Walker at
Toy Replicas.com, who uses materials
similar to what was used when the toy was originally produced. Optimistically, I
also decided to buy a replica box to complete the package.


The first thing was to create a new set of tail fin
supports. After studying photos of an undamaged version, I decided to mould
them out of close grain Ramin hardwood, and made a plasticard template of the
rear to get the angles something like.


Once I was happy with the look, I superglued them into place
and primed them white.
I painted the top with
Revell gloss light blue (50) mixed with a little white, and the base with Revell gloss yellow (12), again mixed
with a little white. Not a perfect match but close enough for me.


Of course, close inspection shows up the repair, but I
reckon it looks fairly reasonable on display, and takes me right back to those
far off childhood days.
Here's a link to Graeme Walker's Toy Replicas site for anyone who might be tackling a Fairylite Stingray repair themselves. http://www.bigredtoybox.com/cgi-bin/s-mart.cgi?command=listitems&pos=140&type=all
Very nicely done!
ReplyDeleteThanks Kev. I believe you had a crack at restoring yours didn't you. Did we featuring it on Moonbase?
DeleteI think so, I used bits from a Comet kit. Oddly, I can't find my photos of it and I normally keep all my photos!
DeleteOddly enough I've got a Comet kit I've been meaning to put together for ages. I can see how you could use the Ratemaster (perhaps a little too big, though) and the rear tail fins on a Fairylite.
DeleteYeah, I seem to remember cutting the ratemaster down a bit?
DeleteThe Fairylite Stingray is a beautiful piece of vintage plastic in my opinion, Scoop. You've done a fantastic repair job. A very enjoyable article and a lovely piece to have in your collection! :)
ReplyDeleteCheers Tony. Yeah, I've always had a soft spot for the Fairylite Stingray since owning one as a child.
DeleteI agree Scoop, a great restoration. the paint colour has worked really well. Good job! Your stingray collection is well away!
ReplyDeleteHi just aquirred fairylite stingray just like the one I sank.50 years ago needs prop ect is usa only place to get parts regards colin
ReplyDeleteIt would seem so, Colin. Good quality parts though.
Delete